There are many types of tools and devices, and Super-O Method supports anything that helps you discover and develop your body's own Response.
Aneros-style devices can be particularly useful because their design allows subtle, involuntary pelvic-floor contractions to create movement and amplify sensations that might otherwise go unnoticed.
But every device introduces an external influence. Just as with deliberate movement, the important distinction is whether that influence works in harmony with the body's Response or begins to override it.
A tool that moves synchronously with your body's natural activity may support the process. One that dominates your attention, encourages forced stimulation or disrupts an emerging rhythm may become counterproductive.
As sensitivity and awareness develop, some experienced practitioners find they need less external input and may prefer A-less sessions — practice without an internal device.
The goal is not dependence on a particular tool. It is developing the ability to recognise, trust and follow your body's own Response.
We'll explore different tools, devices and accessories in greater depth through the Vault.
MICRO-ADJUSTMENTS & PRECISION
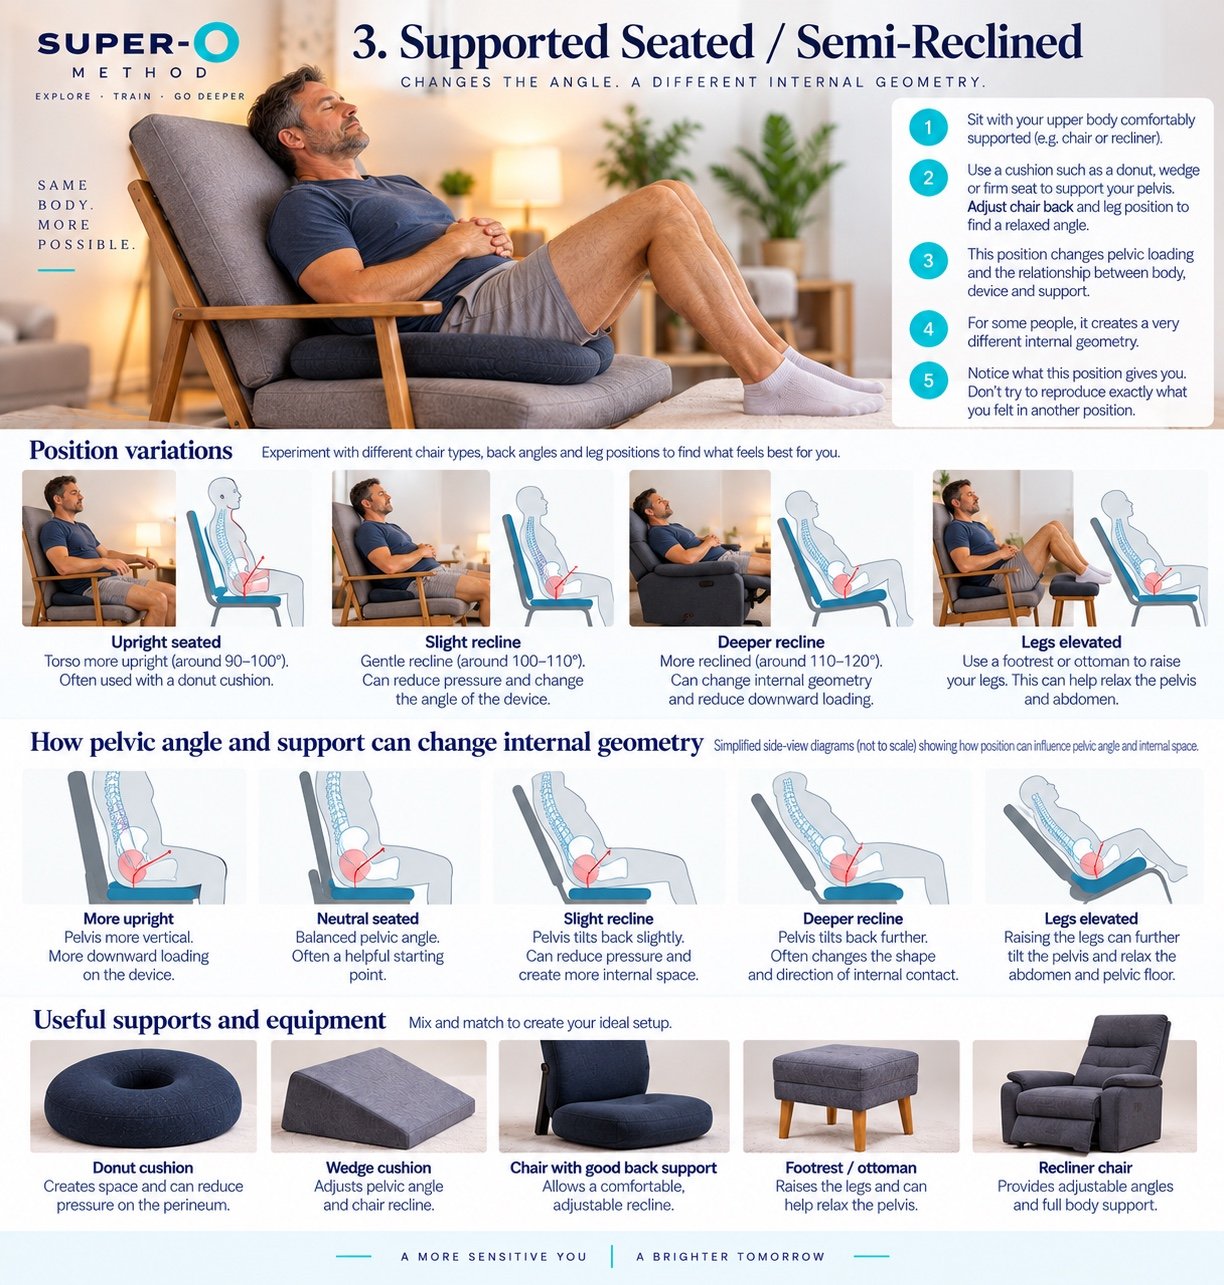
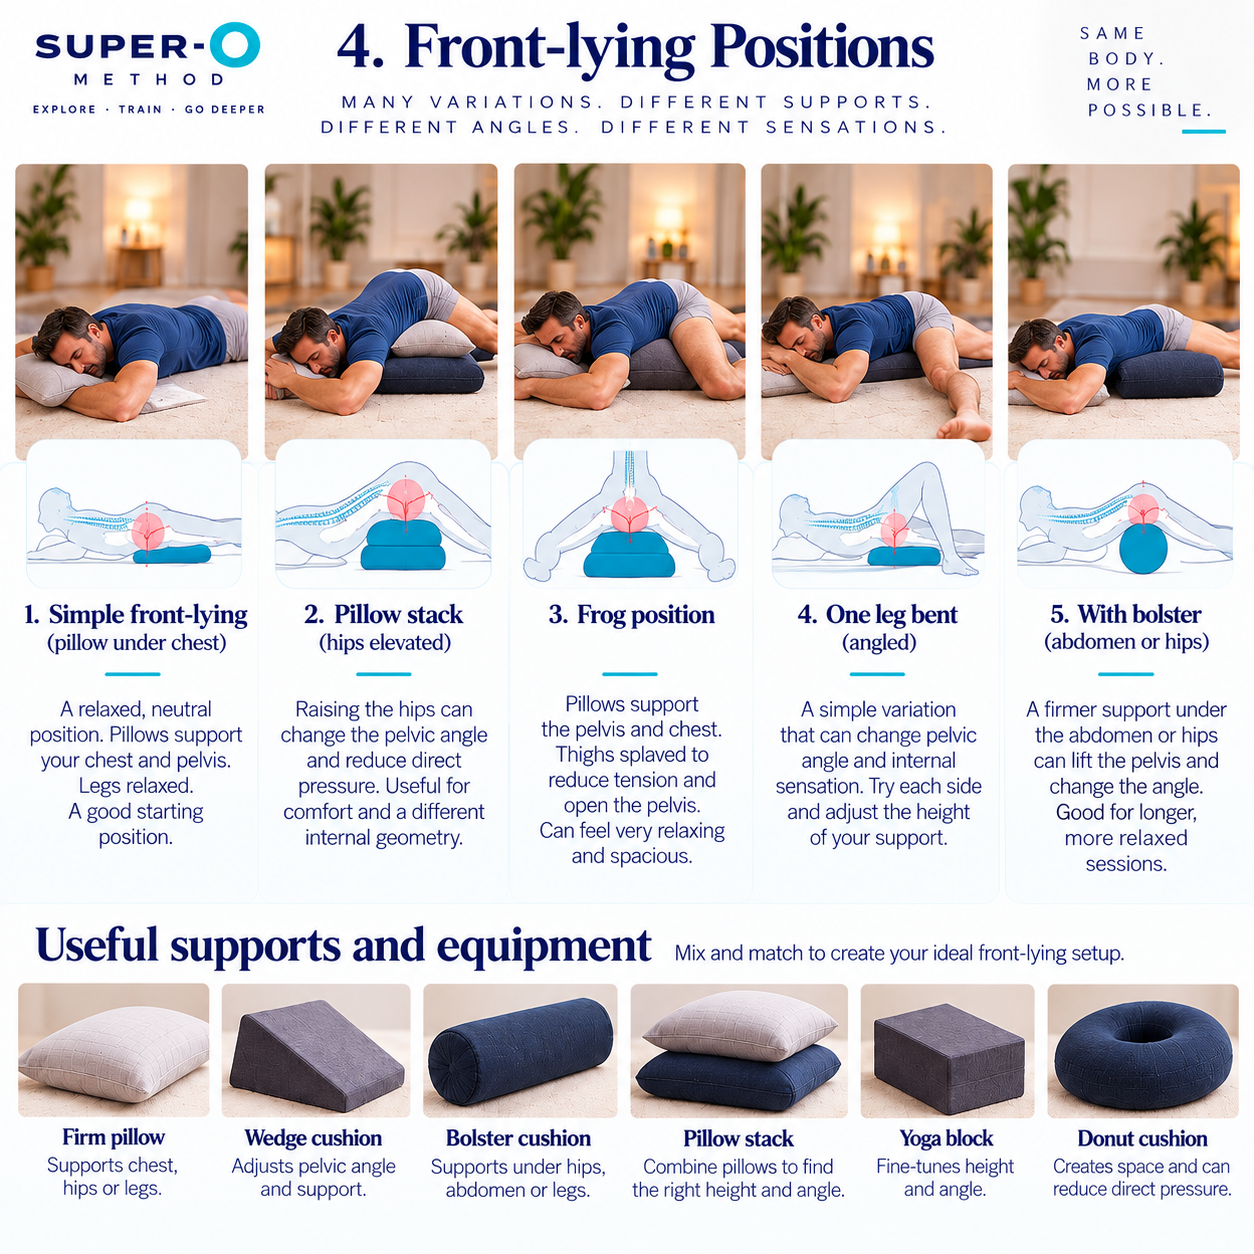
Small changes in pelvic angle, leg position, body weight or cushioning can make a surprising difference to internal contact.
Change one thing at a time. Make a slight adjustment, settle and observe how your body responds before changing anything else.
Stronger pressure isn't necessarily better. Sometimes lighter contact allows greater sensitivity and freedom for involuntary movement.
If an adjustment helps, stay with it. If it doesn't, return to what was working.
Precision means recognising useful changes — not constantly searching for them.
KNOWING WHEN TO CHANGE POSITION
A position that works early in a session may feel different as Response develops. Discomfort, increasing tension or restricted movement can be good reasons to adjust.
But a temporary reduction in sensation doesn't necessarily mean something needs fixing. Response naturally fluctuates.
You can also experiment with changing positions mid-session. Sensations may continue, fade or return differently once you've settled.
Let the body's Response guide your decisions, rather than changing position simply to make something happen.
Sometimes the most useful adjustment is no adjustment at all.
POSITION OPTIMISATION & YOUR TRAINING
Position Optimisation isn't a separate stage of the Method. It's a practical resource you can return to throughout your journey.
During Prepare and Detect, experimenting with different positions can help you establish comfort and recognise early sensations.
As you progress through Align and Allow, you may discover which positions support clearer, more consistent Response with less deliberate Input.
During Expand and Sustain, the emphasis shifts towards accommodating the body's developing Response, making adjustments only when they genuinely help.
You don't need to find a perfect position before moving forward.
Explore when useful. Settle when possible. Let Response lead.
WHERE TO GO NEXT
Go forward to Training 2: Detect
Go back to Training 1: Prepare